Foolproof Ways To Choose The Right Heights To Hang Artwork
Artwork Height on Wall: The Ultimate Guide to Perfectly Positioned Art
Photo by Steph Wilson on Unsplash
Hanging artwork is an important skill that goes beyond deciding where to hang it.
It’s not as simply as merely hammering a nail into a wall. You have to make sure the picture is properly displayed and displayed at its most pleasing height.
This can be particularly challenging if you have several pieces of varying heights in one room.
Explore various groupings, and don't hesitate to experiment in order to find the best layout for your area—perhaps one you didn't even consider!
Here’s a guide on how high to hang art on your wall.
Contents
Step by Step Tips for Hanging Artwork, Wall Decor, and Photos
Arrange Other Pieces Around it (If more than 1 picture)
Considerations for Different Spaces for Artwork Height on Walls
Step by Step Tips for Hanging Artwork, Wall Decor, and Photos:
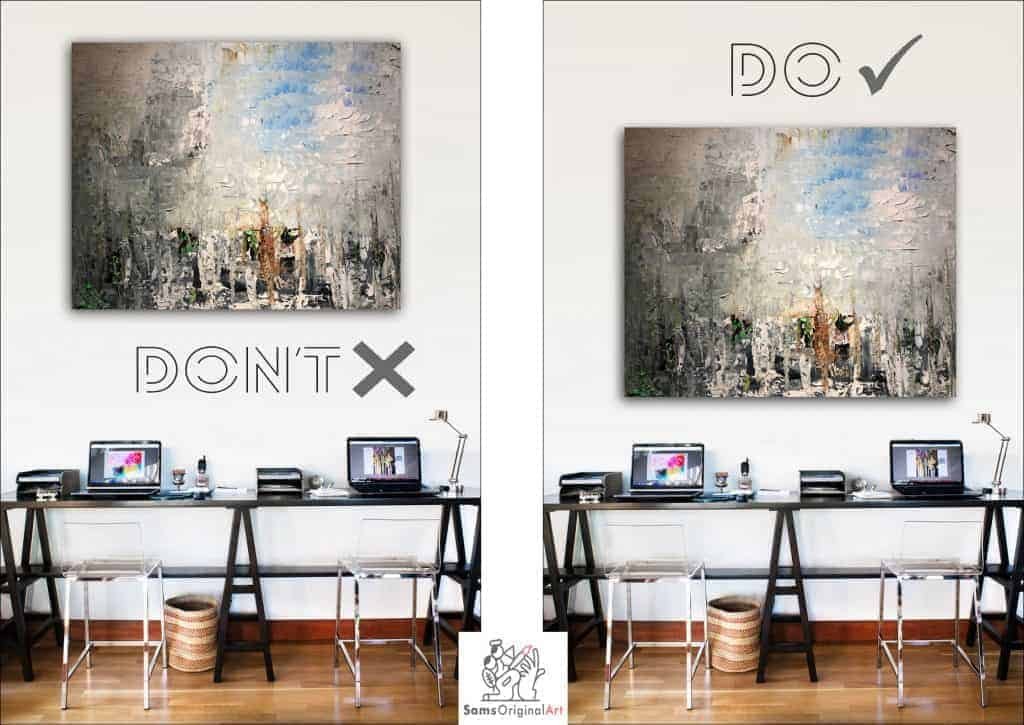
Image: Sam’s Original Art
1. Gather Essentials For Hanging Artwork: Art Hanging Tips
According to Martha Stewart, in order to do the home decor project correctly, you will need some essential materials.
Tape measure
Hammer
Carpenter's level (24 inches long)
2 picture hooks
2 D-rings
Next, see the measurement tips.
2. Measure the Size of Your Picture: Art Hanging Tips
Before you get started hanging your picture, the first thing you should do is measure it!
This is important because the size of the picture will determine where and how high you should hang it.
Write down the measurement of the center of the wall decor.
Calculate the center of the artwork by dividing its height in half.
Image: Parkwest Gallery
3. Find The Ideal Art Hanging Height: Art Hanging Tips
It is often said that artwork should be hung at eye level (57-60” from the floor), however, depending on the architecture and furniture arrangements in your space, there are valid reasons to hang pictures above or below this standard height.
Once you have determined the size of your picture, consult the charts below showing suggested heights for measuring where to hang pictures depending placement.
Image: Hillary Whitaker Gallery
How to hang artwork that stands alone
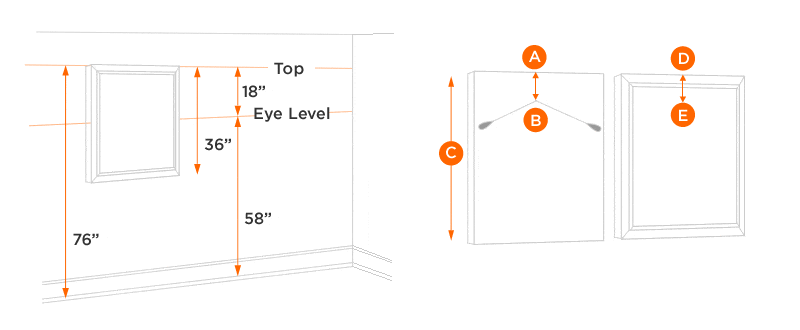
To hang standalone art,
measure the distance between the wire at full tension (B) and the top of the frame (A). See image above.
Measure the height of your frame (C) and divide the result in half.
From the floor, measure up the wall to 58-60" (average eye-level) and make a pencil mark.
From the mark, measure upward the distance recorded in step 2 and make a second light pencil mark (E).
From this mark, measure downward the distance recorded in step 1 (D).
Place nail and hanger here. Make sure that the bottom of your hanger is resting on the line when you hammer your nail in, rather than the nail point. This is where your wire will rest (on the crook of the hanger).
How do I display art in my living room?
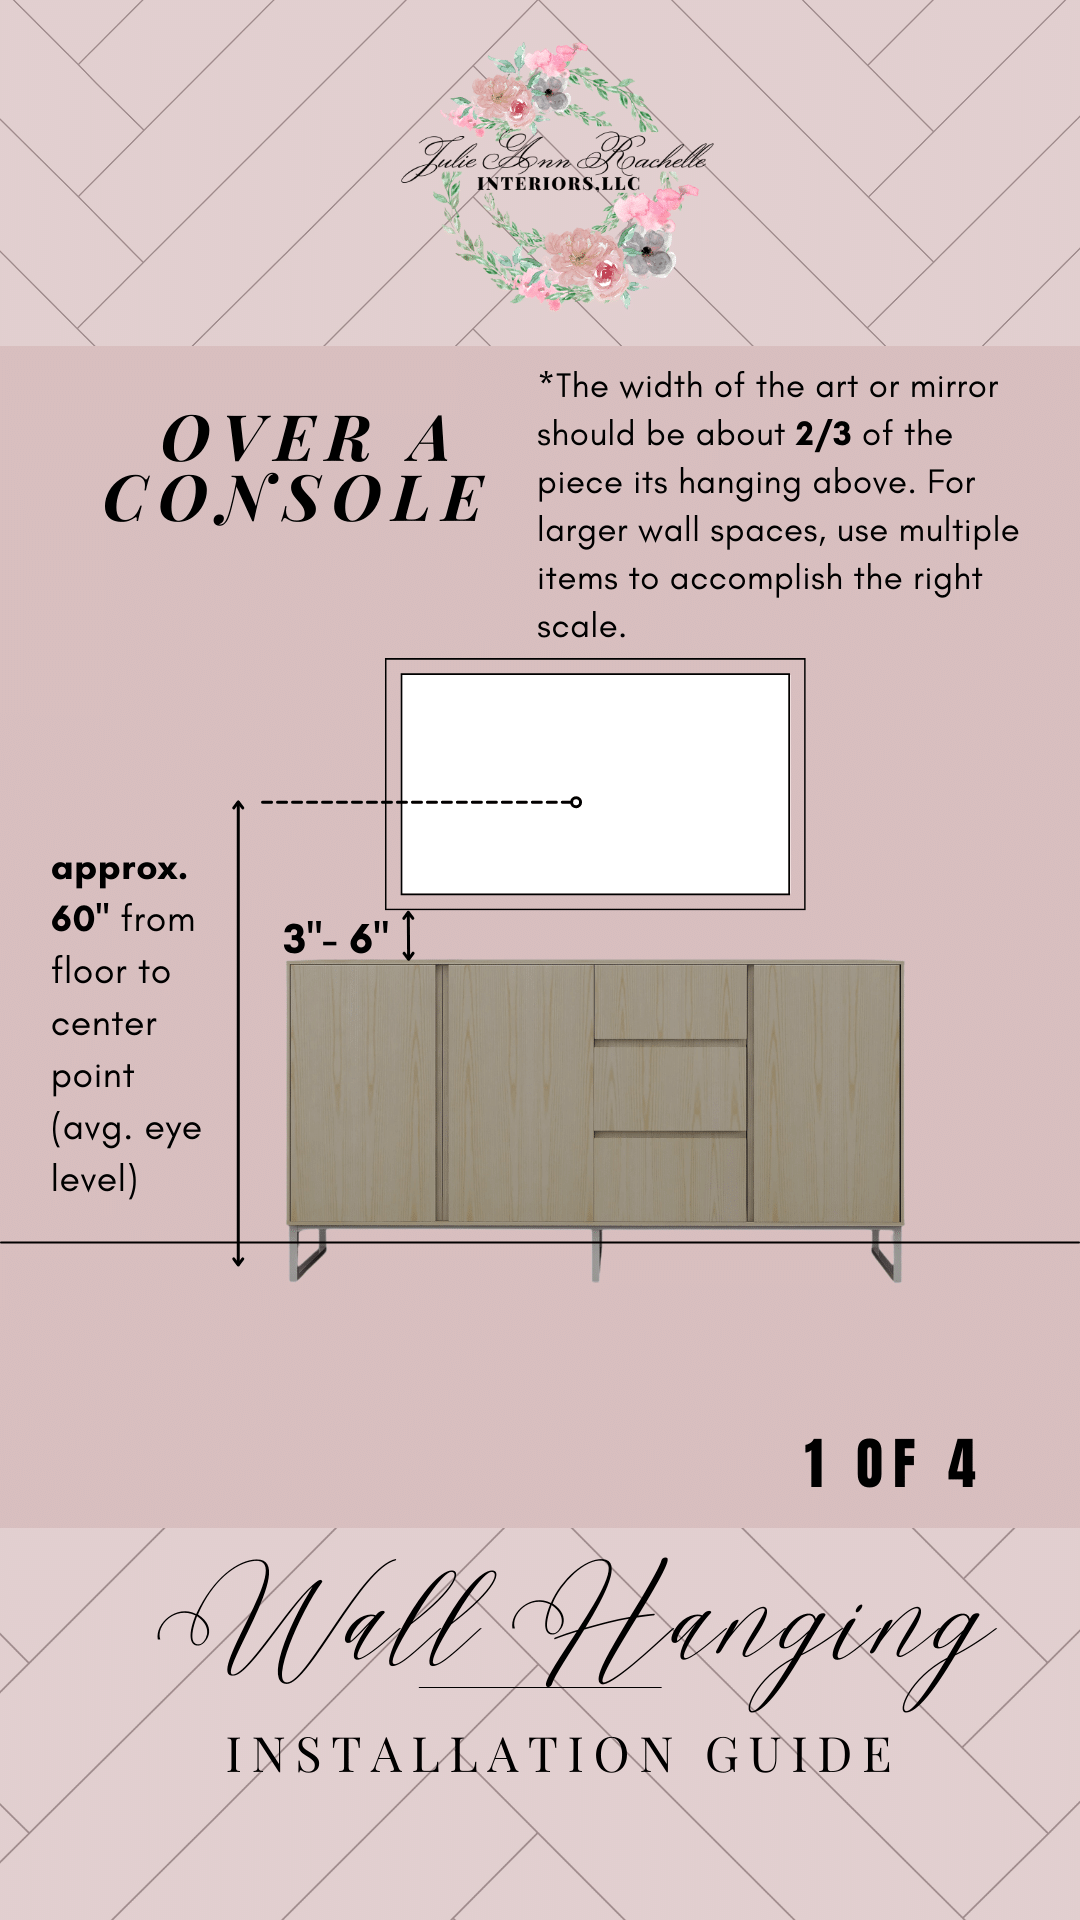
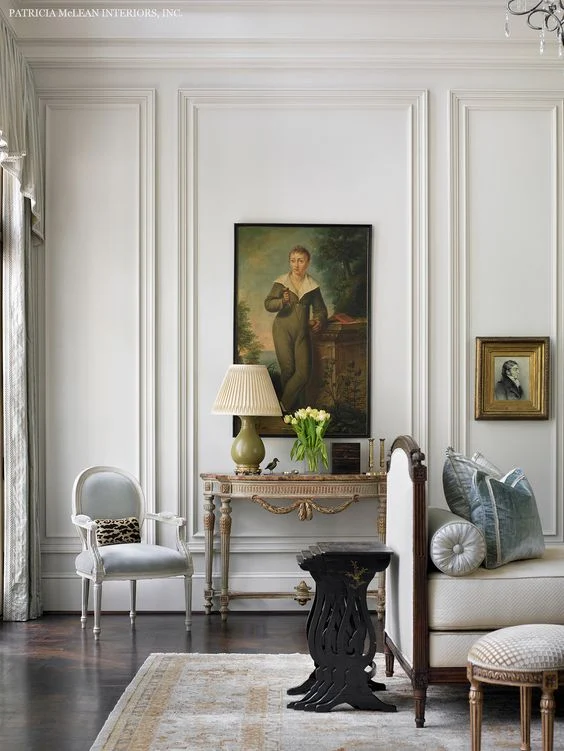
WHERE TO HANG ARTWORK OVER A CONSOLE
Over a console, the width of the art or mirror should be about 2/3 of the piece it is hanging above.
For larger wall spaces, use multiple items to accomplish the right scale.
To determine how high to hang art above console table, measure the center of the picture, then hang the center approximately 60” from the floor (average eye level).
NOTE: Make sure that there is 3-6” between the top of the console and the picture.
View and download my Over a Console Installation Guide here.
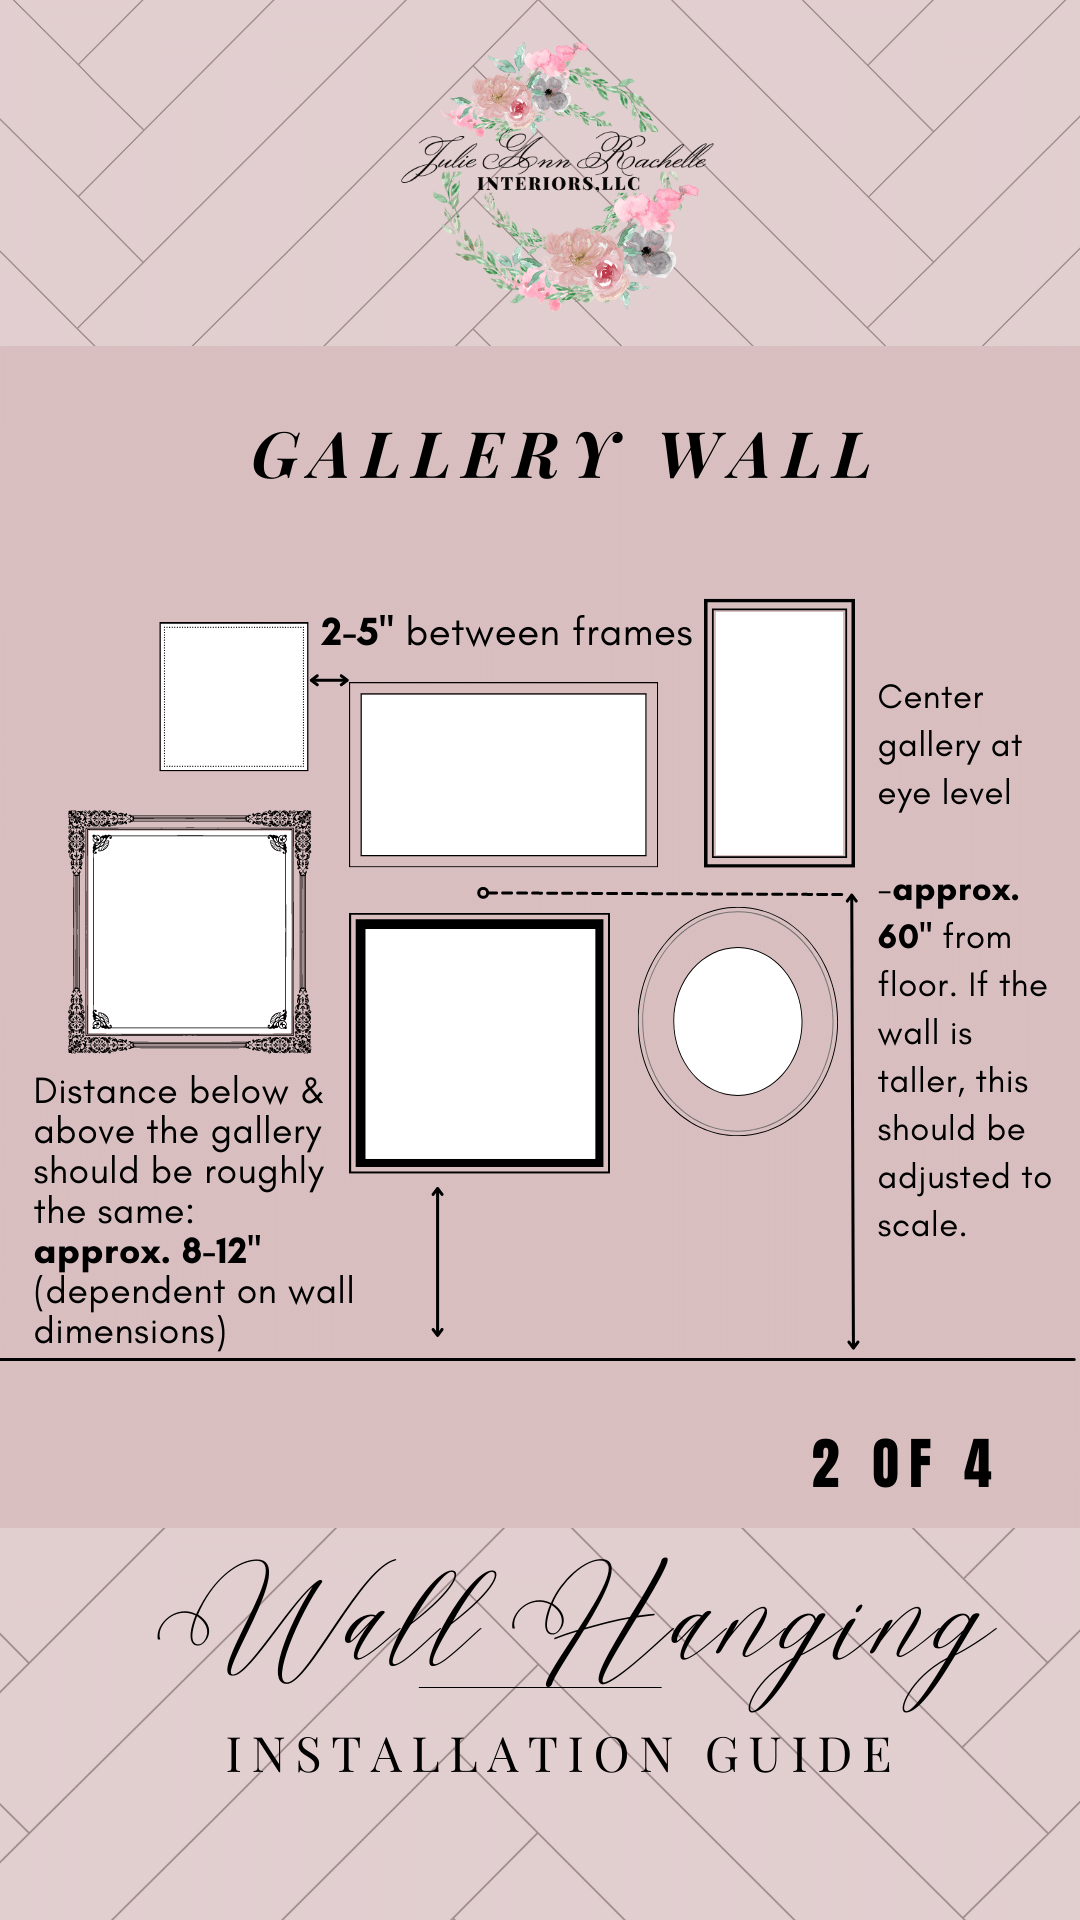
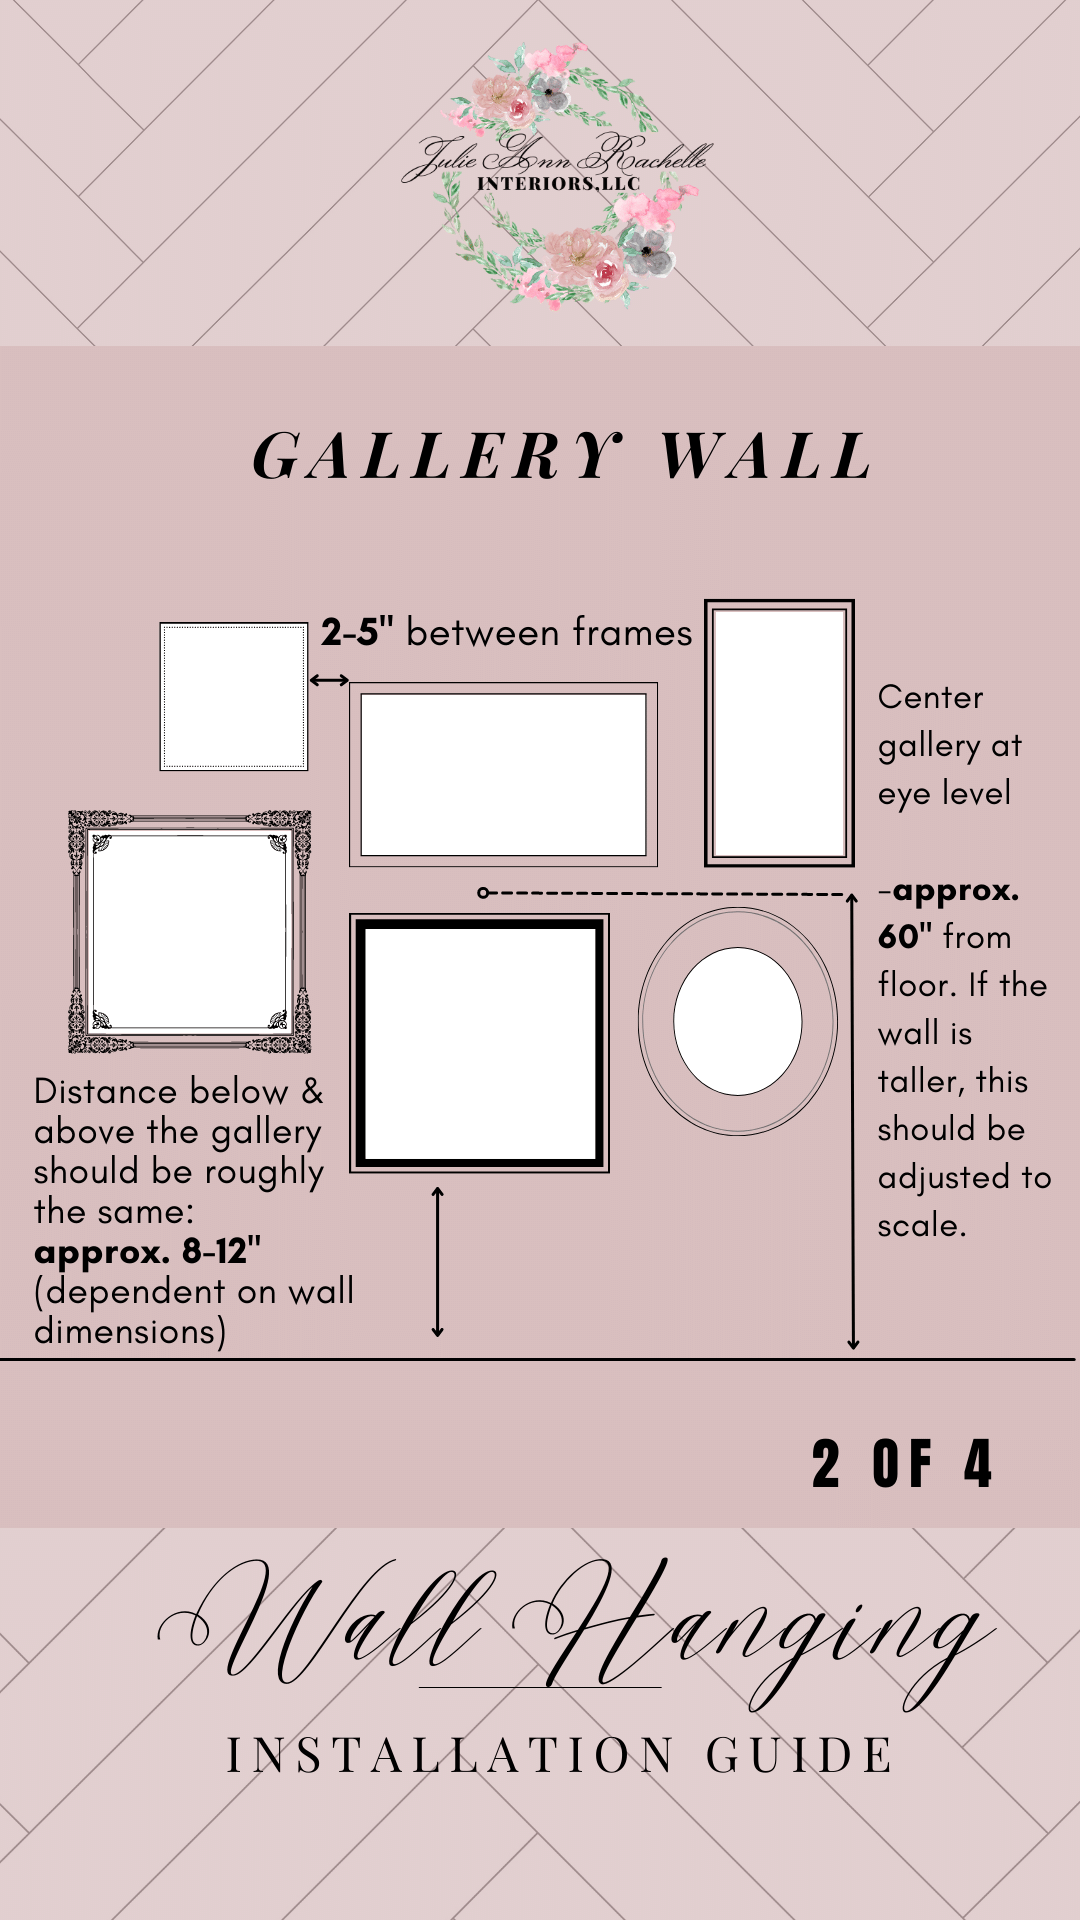
ART HANGING TIPS FOR A GALLERY WALL
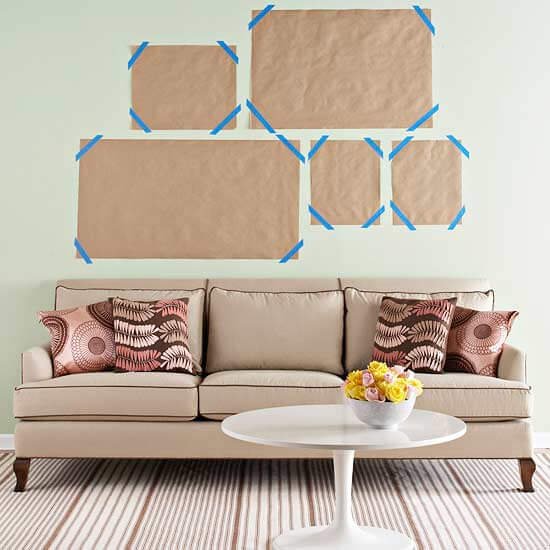
For a gallery wall, my best tip is to first trace the frames on wrapping paper or brown paper, and cut the templates out.
Take the tracings, and decide the arrangement on the floor.
You want to keep the measurement the same between frames.
A good distance between frames is 2-5”.
Estimate where the picture wire or hook will be by measuring from the wire to the top border of the frame, and make a mark on the paper template to indicate this spot.
With the marked-side facing outward, line up the nail marks on your shape to those on the wall and steady it with painter’s tape.
This will enable you to take a few steps back and get an idea of what your decoration will look like from farther away.
If needed, don't hesitate to make adjustments.
4. You want the center of the whole arrangement to be at eye level, which is approximately 60” from the floor.
If the wall is taller, this should be adjusted to scale.
Source: Cortile Gallery
5. Keep the same amount of distance below and above the gallery.
Strive for approximately 8-12” above and below, dependent on wall dimensions.
What are the best places for hanging artwork?
Finding the best spots to hang artwork in your home can transform mundane walls into captivating displays, infusing your spaces with personality and warmth. The trick is choosing locations that not only showcase your art but also enhance the room's aesthetic and functionality.
Here are some prime spots to consider when hanging your artwork:
1. Over the Sofa
The space above the sofa in your living room is prime real estate for artwork. It's often the room's focal point, offering a large, blank canvas perfect for making a statement. Aim to hang your piece so that the bottom of the frame is 4-8 inches above the back of the sofa to create a cohesive look.
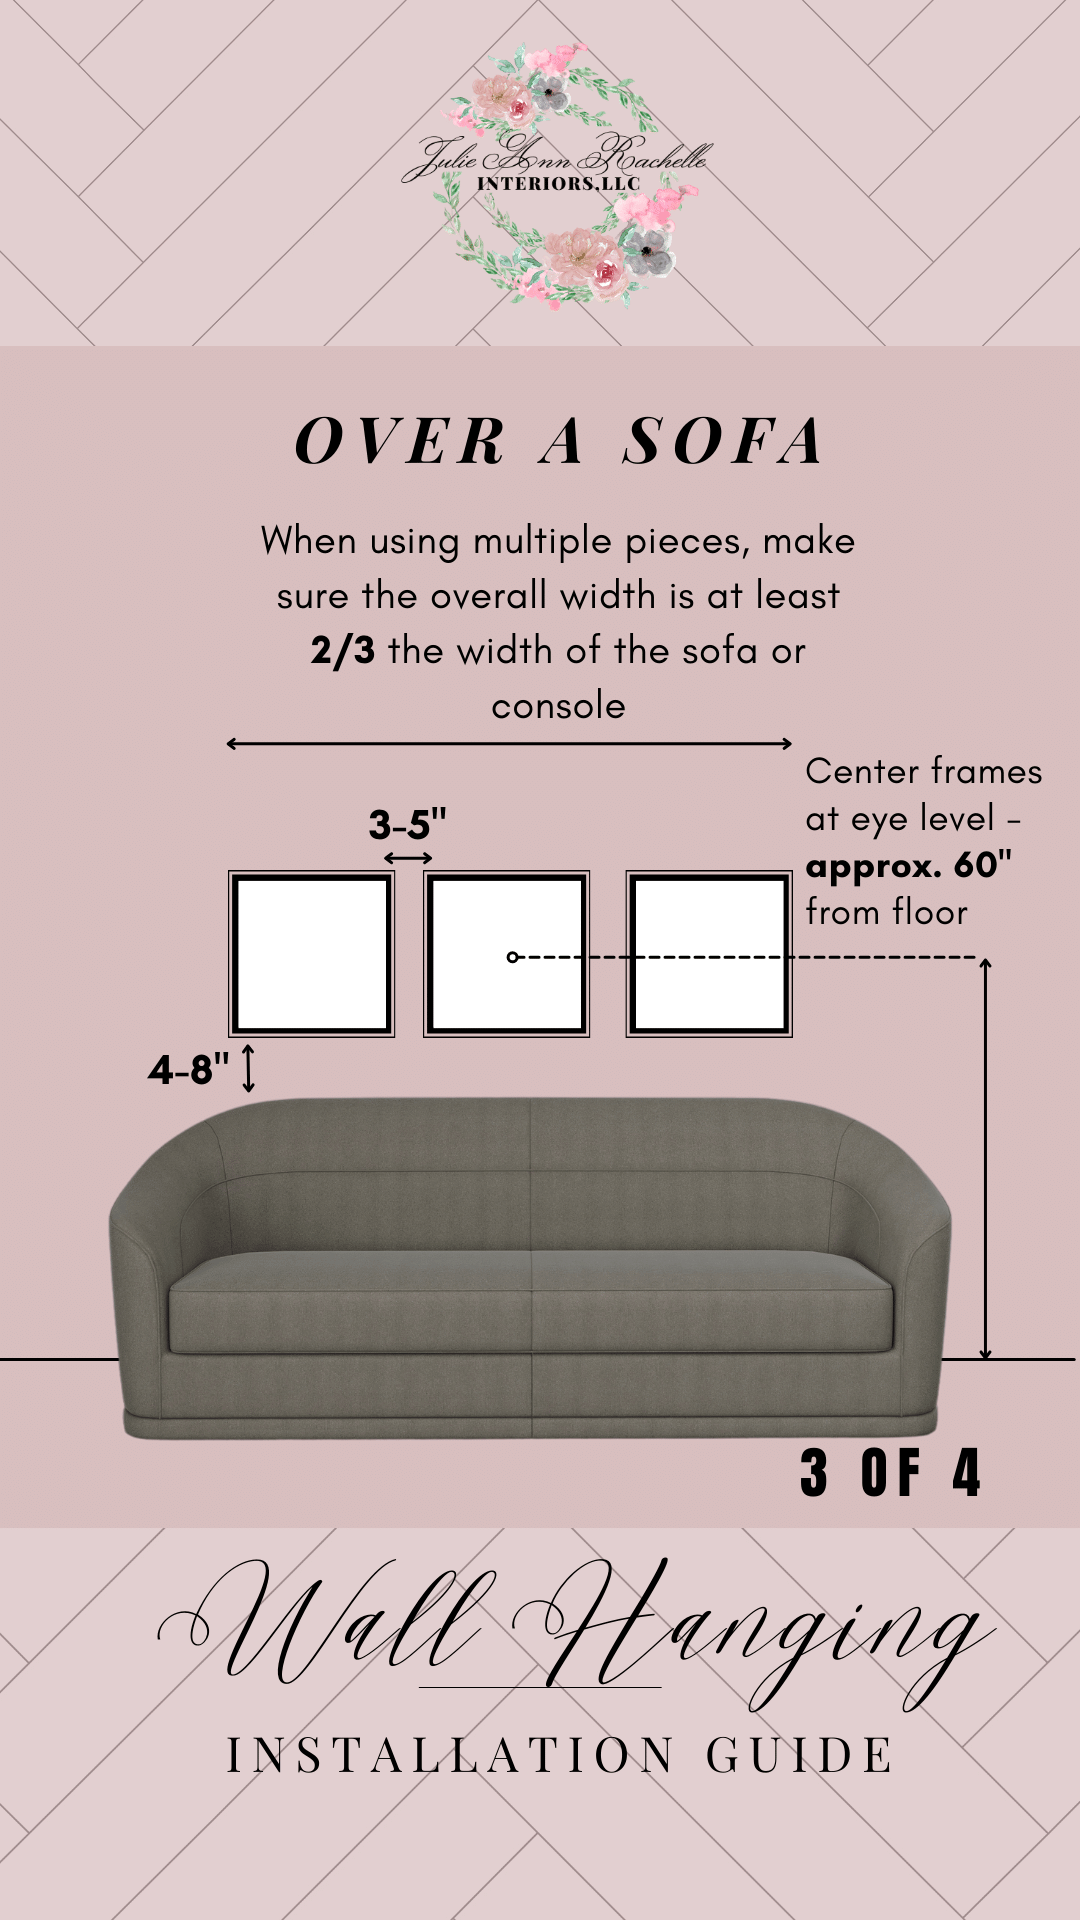
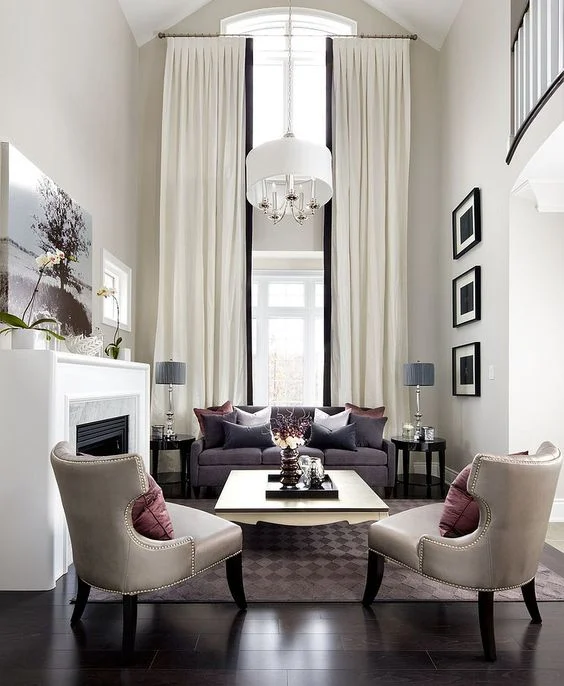
HANGING ARTWORK OVER A SOFA
To hang paintings over a sofa, make sure that the width of one or several wall decor items is at least 2/3 the width of the sofa.
Center frames at eye level - approximately 60” from the floor.
Make sure that there is between 4-8” distance between the top of the sofa, and the bottom of the frames.
Select a width of 3-5” between frames, and keep the same width for each.
2. Above the Mantel
A fireplace mantel is a traditional spot for art, providing a central focus in the room. The art here commands attention and sets the tone for the space. Remember, the artwork should be in proportion to the mantel to maintain balance, and not too high to keep it connected to the space it occupies. Learn more
3. In the Hallway
Hallways often become overlooked spaces, but they offer a wonderful opportunity to create a gallery-like experience. Use the length of the hallway to your advantage by hanging a series of prints or photos at eye level, turning a simple passage into a journey through your personal tastes and memories. Learn more
4. At the End of a Corridor
A piece of artwork placed at the end of a corridor draws the eye, adding interest and perspective to the space. This strategic placement can make narrow corridors feel more spacious and inviting, turning a dead end into a destination.
5. Beside a Window
Hanging artwork beside a window can create a beautiful juxtaposition between the indoors and outdoors. It's a great way to balance the natural light and view with your interior décor, ensuring the art is visible and enjoyed at different times of the day.
6. Above the Bed
The wall above the bed is a perfect spot for artwork in a bedroom, creating a focal point that anchors the room. Whether it's a single large piece or a collection of smaller works, ensure it's centered over the bed to maintain symmetry and balance.
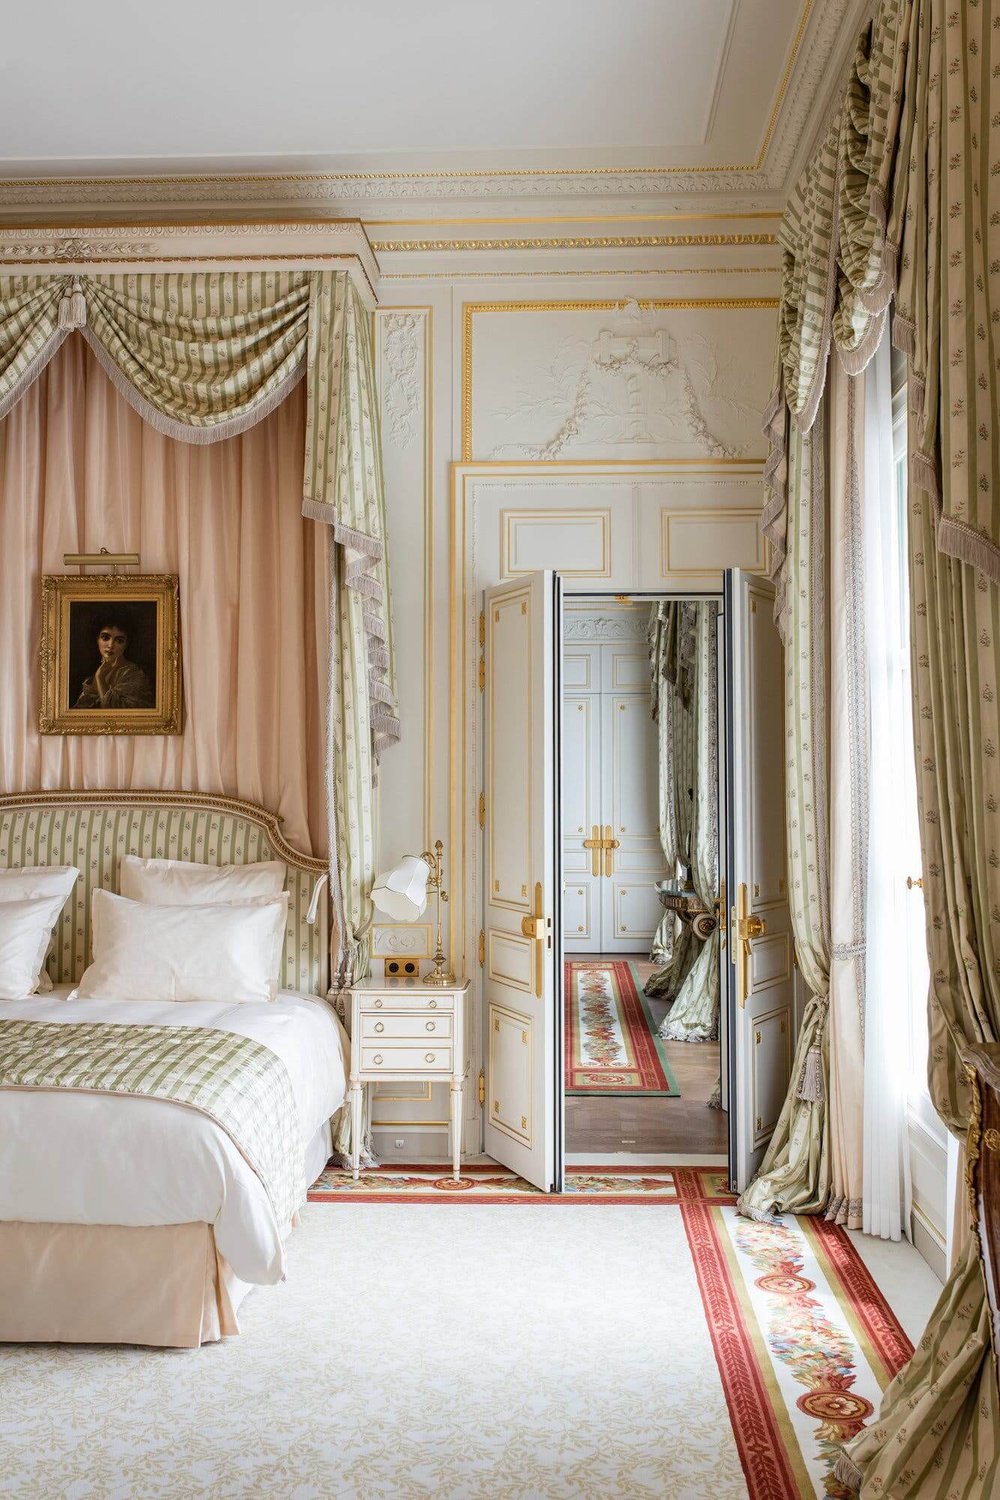
HANGING ARTWORK OVER A BED
To hang a picture over a bed, the height of the wall hanging depends on the headboard and ceiling height.
You want to hang it at least 4” from the ceiling or crown molding, however,
it is more important to keep it between 3-8” above the headboard when deciding how high above bed to hang art.
Be sure that the overall width is at least 2/3 the width of the headboard, but not wider than the headboard.
7. In the Dining Room
Artwork in the dining room can stimulate conversation and enhance the dining experience. Hanging art on the wall adjacent to the dining table or on a wall that's visible from the table adds depth and interest to the space, making meals more enjoyable. Learn more
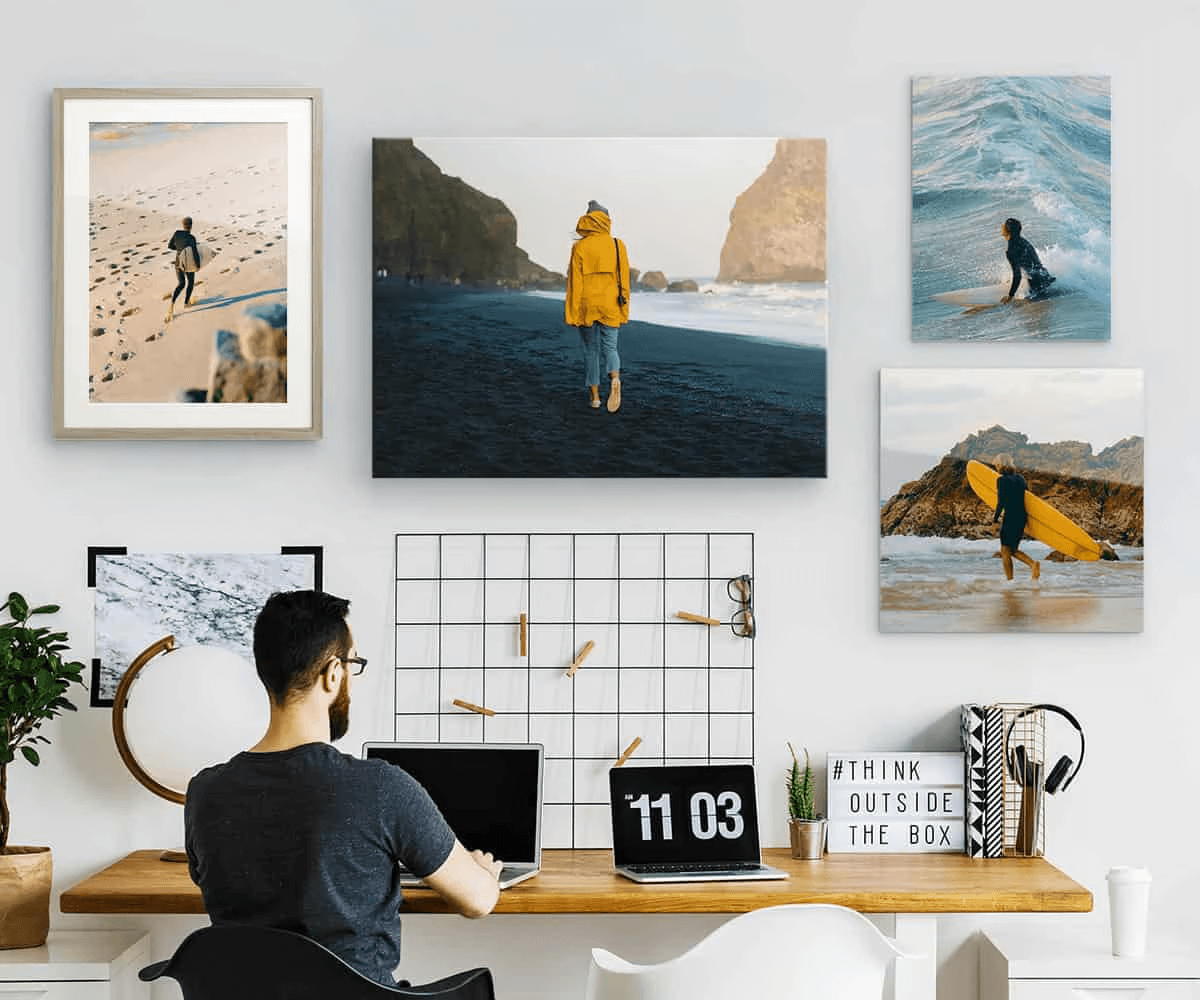
8. Home Office or Study
In a home office, art can serve as a source of inspiration or a calming influence. Place artwork above your desk or on a wall you face frequently to enjoy its beauty and motivational qualities throughout the workday. Learn more
9. Kitchen
The kitchen, often referred to as the heart of the home, can benefit greatly from artwork. Consider smaller pieces on backsplashes or empty wall spaces between cabinets. Art in the kitchen adds a personal touch to a space that's both functional and social.
10. Bathroom
Art in the bathroom can create a spa-like atmosphere or add an element of surprise and sophistication. Opt for artwork that complements the mood you want to achieve, whether it's serene and tranquil or bold and energetic.
Placement Tips
Lighting: Ensure artwork is placed where it can be properly lit, either by natural light or well-placed artificial lighting.
Humidity: Be cautious with artwork in bathrooms or kitchens where humidity and temperature changes can damage sensitive materials.
Visibility: Place art at eye level in most rooms, adjusting based on the room's primary activities (sitting in a living room, standing in a hallway).
Incorporating artwork into your home decor is a personal journey, reflecting your style and stories. Experiment with these locations to find the perfect spot for your pieces, creating an environment that's both inviting and expressive.
4. Check If You Need Extra Support: Art Hanging Tips
When you're ready to actually mount your frame, begin by testing if it needs extra support – such as drywall anchors if you are mounting your frame in drywall or on a wooden surface – or special construction hardware to secure it safely onto plaster/drywalls or sheetrock walls in older homes.
“When it’s time to hang your art, use the method that provides the most stability. It’s usually best to use two picture hangers, so frames don’t swing or tilt.
1. Install two D-rings on the back of the frame, directly opposite each other.
2. Once you’ve decided where you want to hang a picture, make a mark on the wall in pencil for each hook; use the level to make sure the marks are at the same height.
3. Hammer one picture hook into each mark you made on the wall.
4. Pick up your picture and hook the D-rings over the picture hooks to hang your piece.”
5. Hang Your Picture: Art Hanging Tips
Once these D-ring supports are in place (if needed), then use two nails spaced accordingly for large framed pieces and only one nail for smaller ones when aiming for greater stability over looks – this usually works well with medium photo frames that weigh up to 8 lbs each and more backlit frames that may require larger hooks handling heavier weights per specifications provided.
Finally, use a leveler tool to ensure that your artwork hangs straight before securely fastening with wall anchors (if necessary)
6. Arrange Other Pieces around It: Gallery Art Hanging Tips
When it comes to hanging art, the centerpiece often steals the show, but the magic truly happens when you masterfully arrange other pieces around it.
Think of your central artwork as the star of the show, with every other piece playing a supporting role.
The key is balance and harmony. Start by choosing art that complements the colors, themes, or textures of your main piece.
Consider varying the size and orientation of these surrounding pieces to create visual interest and movement.
Space them thoughtfully, keeping in mind that too much clutter can overwhelm the eye, while too much space might underwhelm.
A pro tip is to lay your arrangement on the floor to experiment with placements before making any commitments to the wall.
This strategy not only enhances the aesthetic appeal of your space but also tells a more cohesive story through your art collection.
Considerations for Different Spaces for Artwork Height on Walls
Let's dive deeper into how the general rule for hanging art—centering at eye level—can be adapted to fit different rooms in your home. Each space has its unique vibe, function, and audience, so tweaking your approach can really make a difference in how artwork contributes to the room's overall feel and usability.
Living Room
How to Decorate in a Maximalist Style - AI image for inspirational use only via interiordesigninfo.com
In the living room, art serves as a focal point and conversation starter.
Here, sticking close to the 57-60 inch rule from the floor to the center of the artwork generally works well, as it aligns with the eye level of someone standing.
However, if your living room is a place where people are more often seated, consider hanging your art slightly lower to cater to the seated eye level.
This adjustment makes the artwork more enjoyable and engaging for those lounging on sofas and chairs.
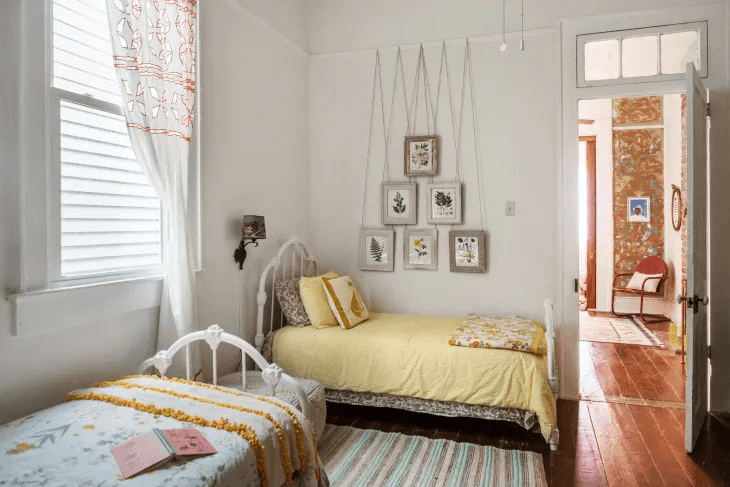
Child's Room
When it comes to a child's room, throw the standard rule out the window—figuratively, of course.
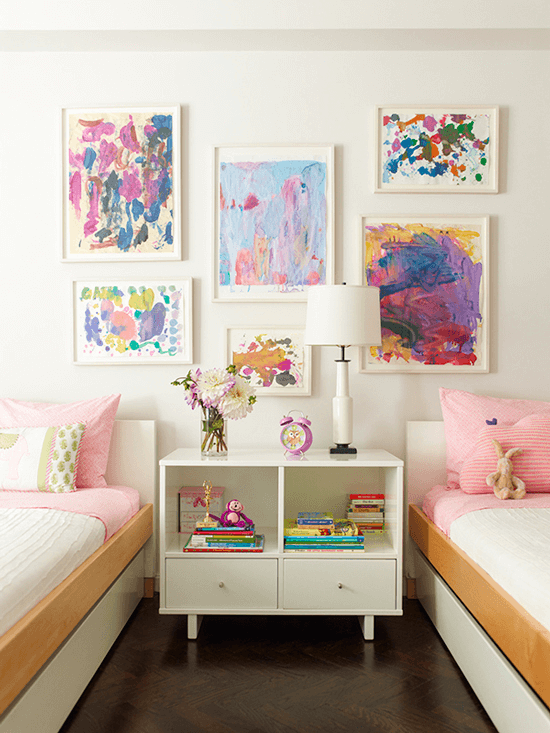
In these spaces, you're catering to a much shorter viewer. Hanging artwork at the child's eye level makes the room more inviting and personal to them.
It encourages interaction and appreciation from the little ones.
Plus, it's a fun way to make them feel like the room is truly theirs.
Think about lowering artwork to about 30-40 inches off the ground, depending on the child's height.
Hallway
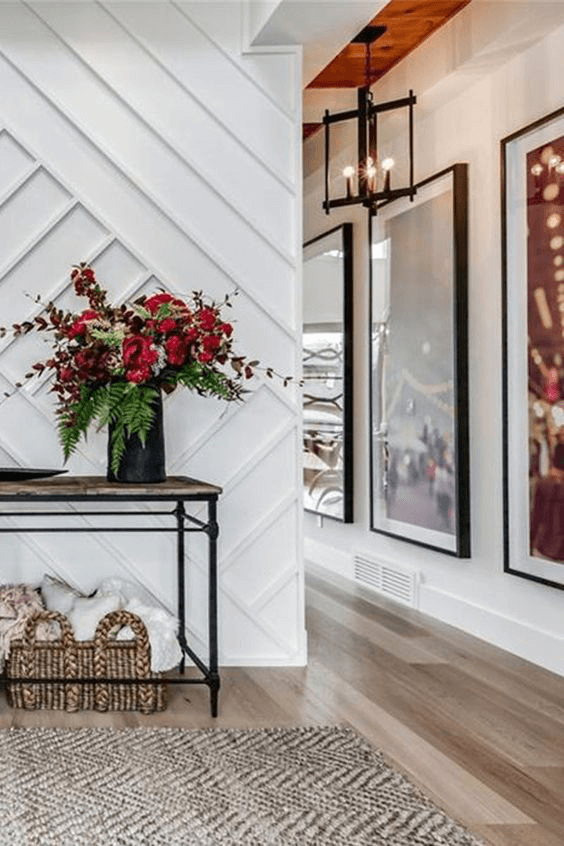
Hallways are unique because they're typically narrower spaces where people pass through rather than linger. In this case, maintaining the artwork at the standard eye level (around 57-60 inches) works well since it's likely to be viewed from a standing position.
However, if you're creating a gallery wall, you might start your arrangement at eye level but extend the display both above and below this point to fill the vertical space, especially if you have a long, empty wall to work with.
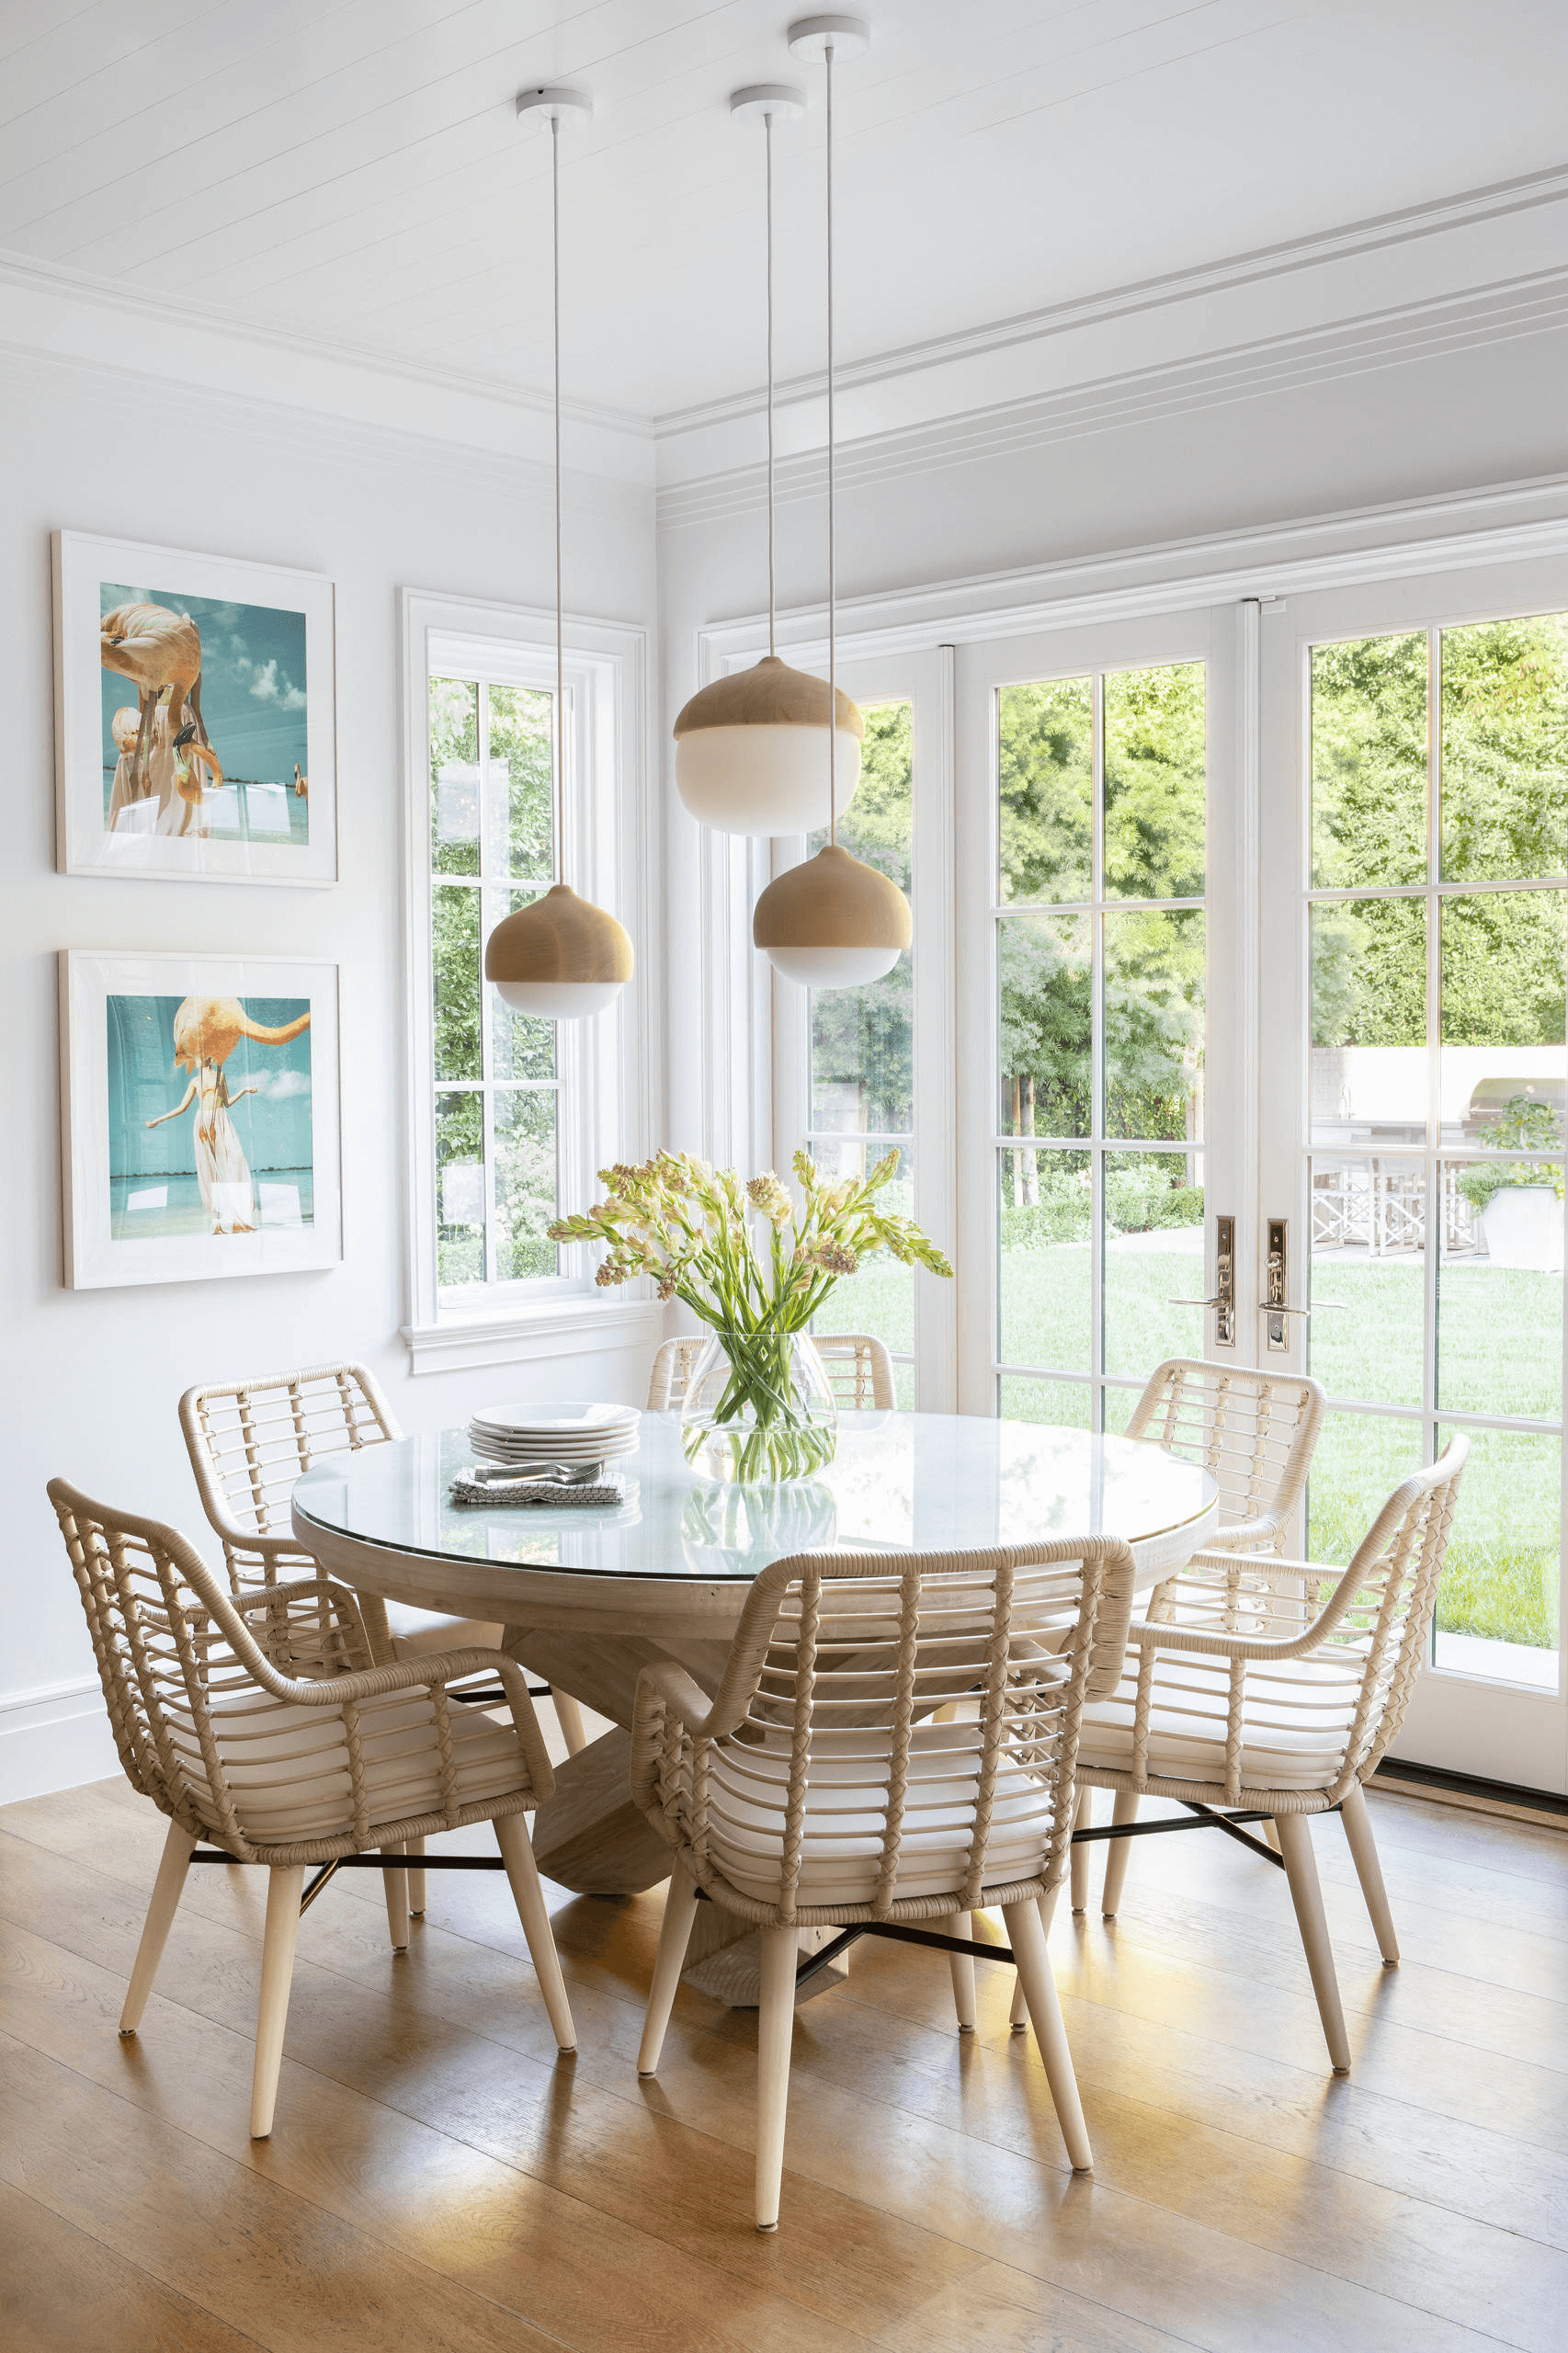
Dining Room
Chango and Co. via Houzz
Dining rooms are another area where the context changes because people are usually seated.
Consider hanging artwork a bit lower than the standard to enhance the dining experience. Artwork here can be more intimate and detailed, encouraging diners to enjoy the pieces at a closer range.
A good rule of thumb is to hang art so that the bottom of the frame is about 8-10 inches above the back of the dining chair when no one is sitting in it.
Bedroom
In bedrooms, particularly above the bed, the artwork can be hung lower than the standard eye level to create a connection with the furniture.
If you're hanging a piece above the headboard, aim for 5-8 inches above it to create a cohesive look.
This positioning ties the artwork visually to the bed, making it a part of the room's relaxing and restful atmosphere.
Office or Study
In a home office or study, where functionality meets design, consider the placement of artwork in relation to your line of sight from your seated position.
You might want to hang pieces slightly higher if they're above a desk or other pieces of furniture, ensuring they're in your view and not obstructed.
However, the artwork should still be close enough to enjoy without having to crane your neck upwards, blending inspiration with ergonomics.
Remember, these guidelines are just that—guidelines. The most important consideration is how the artwork feels in the space and to you.
Don't be afraid to trust your instincts and make adjustments based on what looks and feels right in your home. After all, your space is a reflection of your unique taste and lifestyle.
Favorite Art Finds
People Also Ask
What is the rule of thumb for hanging pictures?
The rule of thumb for hanging pictures is to hang them at eye-level.
This helps create an aesthetically pleasing effect, as viewers will not be straining their necks to look up or down at the picture.
When in doubt about what height is best for viewing the picture, err on the side of caution; hang it 57-60” from the floor to it’s center.
Remember to also keep the spacing between each picture and artwork equal; grouping similar sized items next to each other can help create a cohesive and stylish wall art display.
Should pictures be hung higher or lower?
When deciding where to hang pictures, the height of the picture should always be determined by the center point of the artwork.
Generally, it is best to hang your artwork so that its center is at eye level.
Typically this means keeping your artwork between 57 and 60 inches from the floor.
However, taking aesthetic into account, it can sometimes look better visually to hang pictures either lower or a bit higher depending on the size and style of the artwork and other elements in a room's design.
Additionally, heights for pictures should be adjusted for viewers of all sizes in order to ensure that everyone can enjoy art without craning their necks in an uncomfortable way.
Can you hang a picture too high?
Hanging pictures too high can be a common decorating mistake, it’s one of the most common mistakes I see in people’s homes.
Although there is no exact rule as to what constitutes “too high,” if you look up at a picture on the wall (or crane your neck) to see it, then chances are it's too high.
The height of art should depend on the shape and size of it, but generally speaking, artwork should be hung at eye-level or slightly above eye-level so that it looks balanced and pleasing to the eye.
Hanging a picture too high will draw attention away from the content or message and towards how it is displayed.
Therefore, when hanging art, make sure to set pieces at an appropriate level for them to be enjoyed both aesthetically and conversationally by those who enter your space.
How many inches should a picture hang from the ceiling?
While there is no single answer to this question, the general rule of thumb when hanging a picture from the ceiling is that the center of the frame be approximately 57-63" inches from the ground.
This will create an appropriate height for optimal viewing of the artwork and will ensure that the piece does not feel cramped or cluttered when hung close to other pieces or decor in a room.
However, depending on personal preference and aesthetic desires for the particular space, one may choose to deviate from this general guideline if desired.
How close to the ceiling should you hang a picture?
When it comes to hanging pictures near the ceiling, you must consider the height of the room.
In some cases it might not be necessary to hang a picture close to the ceiling, especially if the room is on the shorter side.
Generally speaking, however, good practice would suggest a distance anywhere between 4-8 inches from the ceiling for regular 8-10 foot ceilings.
If you have higher ceilings, then you may want to hang your artwork a bit closer for additional emphasis.
For example, in rooms with up to 12 foot ceilings, consider going as high as 18 inches from the ceiling. Be sure to download my guides for hanging pictures above a console, over a sofa, over a bed, and on a gallery wall.
What is the formula for hanging pictures?
Hanging pictures can be a tricky business and many people find themselves in doubts as to what’s the right safe way and how to ensure their artwork will not topple off.
To help with this, there are certain formulas that can be used to figure out the height of where to place the hook or nail needed for hanging a certain item.
To ensure your picture is level and looks great, you want the center of the picture to be at eye level.
This means that measuring from the floor to where you'd like the center of your image will be key in determining how high to hang it.
If a specific measurement isn't available, a good rule of thumb is to measure between 58" and 60" from the floor to put the center at eye-level.
This article goes into detail about the circumstances and creative options. Check the table of contents to match your situation.
Related Reading: Discover my formula for coffee table styling.
What is the correct height to hang a picture?
When it comes to hanging pictures, there is no one-size-fits-all answer.
The correct height to hang a picture will depend on the size of the picture, the type of wall it’s being hung on, and the purpose of the picture.
For most standard sized pictures, such as 8x10 or 11x14 prints, the center of the picture should be hung at eye level, or about 57 to 60 inches from the floor.
This is a good starting point for any picture and can be adjusted as needed.
This height works well for most standard sized pictures and allows viewers to appreciate the artwork without having to strain their necks.
For larger pictures, such as 16x20 or 20x30 prints, the center of the picture should be hung slightly lower than eye level, around 54 to 57 inches from the floor.
This will help keep the picture in the center of your guests' line of vision.
How high should I hang my artwork?
In general, the bottom of the art should be hung about 5-6 inches from the top of the furniture.
This ensures that the artwork does not look overbearing or too crowded on the wall.
Depending on the size of your artwork and where you’re hanging it, this number may vary slightly as you don’t want your piece looking dwarfed or out of place with other pieces at a lower level.
For instance, for a smaller piece being hung above a couch, 8-10 inches from the top (or 7-8 from the back) usually looks best aesthetically speaking.
How high to hang pictures over a bed?
When it comes to hanging pictures over a bed, the correct height is important to creating a balanced and aesthetically pleasing look.
Generally, the recommended height is between five and seven feet off the ground, but this should be adjusted to the size of the wall and bed.
To avoid making mistakes, it's best to measure the wall and bed before deciding how high to hang the pictures.
After measuring, use painters tape to mark the area of the wall where the pictures should be hung.
This will help ensure that the pictures are hanging at the correct height and in the right spot.
See the guide above for more exact measurements for how high above bed to hang art.
How high to hang pictures on a gallery wall?
Creating a perfect gallery wall is not as hard as it seems, but there are some guidelines to follow.
First, the center of your artworks should be approximately 56 to 60 inches from the floor.
Hang pictures with either the top or the bottom at this height for a balanced aesthetic.
If you’re hanging multiple pieces together, hang them 4 to 6 inches apart, keeping the distance consistent. Make sure all frames are level and hang artwork on eye level (5-6 feet from the floor).
With these steps in place, you can create an attractive gallery wall for display in your home. Learn more
How do you hang 3 pictures in a row?
Credit: @dianamariehome via frameiteasy.com
When hanging three pictures on a wall, it is important to use an appropriate layout to ensure the walls look aesthetically pleasing.
One popular layout for three pictures is the triangular arrangement, which involves placing the pictures in an angled triangle formation.
Credit: Allison Holman Trammell via frameiteasy.com
This creates depth and balance around the room and is easy to recreate against any backdrop.
Additionally, creating a single horizontal row of three pictures is also effective when done in the right proportions; think about spacing the frames apart equidistance from each other and make sure that each picture has a structured height and width pattern.
Finally, arranging one large picture with two smaller ones either side can create an eye-catching focal point around the room while also incorporating 3 distinct pieces of artwork into your space.
How do you hang 4 pictures on a wall?
To hang 4 pictures on a wall, you should choose a layout style that fits the room's overall design and style.
Depending on the size of your wall and the size of the prints, you can go for a cluster arrangement or create an organized grid shape.
Other options include:
Hang the 4 pieces of wall decor in a straight horizontal line, this looks best when all 4 frames are the same size.
Create a scattered look within a square or rectangle for images of different sizes.
Hang 2 frames of one size with 2 frames of another size within a rectangle shape.
Get creative with oval frames and use any layout that looks right to you.
When it comes to the spacing between the frames, try to keep it even so that all four paintings look balanced!
How high should picture be for 8 foot ceilings?
It is generally recommended that artwork should be hung approximately 5–7 feet (or 1.5–2.1 meters) above the floor to ensure that it is at eye level when standing.
When determining how high to hang pictures on an 8-foot (or 2.4-meter) ceiling, you should leave approximately 1 foot (or 30 centimeters) of space between the top of the picture and the ceiling.
This will allow your artwork to be displayed at an appropriate height and is also ideal for achieving a balanced look in your décor arrangement.
Considering this rule, hanging art 6 feet (or 1.8 meters) from the floor is usually recommended for 8 foot ceilings.
Error on the side of hanging it lower if in doubt.
How high to hang a picture on a 9 foot wall?
Today, the ordinary height for ceilings appears to be around 9 feet.
Keeping that in mind, you should hang your artwork between 61-63 inches from the ground to the center of its frame.
However, if your ceiling is higher than 9 feet, it would be wise to still remain within the 61-63 inch range from floor to the focal point of your picture.
The rationale being that you want relating furniture items to harmonize with the wall decor.
The average height for a sofa is 36 inches, and when you suspend your artwork beyond 63 inches you miss out on creating harmony.
How high should I hang a picture for a 10 foot ceiling?
When it comes to decorating a room with high ceilings, many questions arise: What pieces of artwork should I choose? How large should they be? And most importantly, how high should I hang them?
The answer to the last question—how high to hang art with 10 foot ceilings—is probably the most contentious of the bunch.
If you’re not careful, you could end up with a piece of art way too low, or so high it’s uncomfortable to admire it.
To make sure your artwork is displayed at the perfect height for 10 foot ceilings, first consider the size and shape of your room.
Narrow rooms should have artwork hung slightly higher than wider ones, so it won’t overpower a space and appear too cramped.
If your artwork is large, you’ll also need to hang it higher.
When it comes to determining the exact height, some experts suggest following the “60-inch rule.”
This means the middle of the artwork should be 60 inches from the floor.
However, interior designer Kayla Gallo says, “the 60-inch rule is not always the right way to hang art. It depends on the style of the art and its surroundings.”
According to art historian Laura Rogers, the goal should be to place artwork at eye level.
“However, you often need to adjust for aesthetics,” she explains. “You may want to make a statement by playing with the proportions or break a traditional mold.”
When selecting a picture for 10 ft ceilings, it's important to choose a piece that will draw the eye and create interesting visual appeal in the room.
Factors such as wall color, furniture size, and other decor pieces should also be taken into consideration when choosing art for any space.
As a rule of thumb, hang centerpieces about 57-60 inches from the floor for an optimum height.
However, considering that separate factors may need to be taken into account, adjust this measurement as necessary.
The optimal size of the artwork is subjective and dependent upon several elements including size of the wall, so keep experimenting until it looks perfect!
How do you hang art in groups?
What if I have a group of artworks?
For larger pieces or walls with multiple artworks, measure 2-5 inches from each item when hanging them side by side – this will ensure sufficient space between each work while still corralling them together within an aesthetically pleasing grouping.
Additionally, ensure there is approximately 4-6 inches between each individual piece when grouped together in a grid-like fashion to create separation between works without shrinking them down too much! Learn more
What is the hanging height for standalone art?
Photographer: Valerie Wilcox
Source: House & Home April 2017
Designer: Stephanie Pellatt, Pivot Design; Leanne Tammaro and Adolphina Karachok, Designtheory
via HouseandHome.com
For large pieces such as tapestries or mural paintings intended to standalone on a wide wall, you should leave 12 to 20 inches below and above empty space accordingly before beginning your measurements – this adds essential balance than can help bring more life into even wider walls. Learn more with a visual guide
Don't forget to download helpful resources like our installation guides or download the full article.
What are some common mistakes people make when hanging artwork?
Hanging artwork can be a tricky affair, and there are plenty of ways it can go wrong.
Whether you’re an experienced art collector or just starting out, understanding the common mistakes in hanging artwork is key to making sure your artwork is displayed correctly.
For instance, many people hang artwork too high or too low, which can detract from the artwork itself.
When hanging, make sure to hang artwork at eye level, or at least slightly above eye level.
This will keep the artwork within the viewer’s focus, and will create less of a strain on the neck.
In addition to hanging artwork at the wrong height, many people don’t use the right kind of hardware or use too little of it.
This can cause artwork to fall, or become damaged over time as the extra weight pulls down on the hardware.
To prevent this, make sure to use appropriate hardware that can bear the weight of the artwork - if you’re worried, use extra hardware or consider using a track system.
Also remember to hang with a hook instead of a nail, as nails can cause damage to the wall.
Many people also make the mistake of spacing artwork too far apart.
Having too much space between pieces of art will overwhelm the room and detract from the artwork itself. Instead, make sure to space the artwork so that it creates an impact within the room. The ideal spacing depends on the size of the artwork, but experts suggest allowing at least four inches between pieces of artwork.
Lastly, some people hang artwork without considering proper lighting.
While natural or artificial lighting can be incredibly beautiful, it can also be damaging over time if not properly protected.
To avoid this, either use artwork that has UV blockers in the glass or hang artwork in a place where it won’t be exposed to direct sunlight or rays from a lightbulb.
By avoiding these common mistakes, you can ensure your artwork is displayed properly and ready to be enjoyed.
With the right knowledge, and a little effort, you can create a gallery wall or art display that is sure to be the talk of the town.
How can I make my artwork look more balanced?
Creating balanced artwork can be a daunting task—even for the most experienced of artists.
Balancing colors, values, composition, and elements can seem like a daunting task that can take away some of the joy of creating.
Visual Balance for Artwork on Walls
To make the journey easier, here are some tips to help you create visually balanced artwork:
• Color: Color can be used to create visual balance. Using a limited palette, analogous colors, or monochromatic colors can create harmony in an artwork.
• Composition: Composition is one of the most important elements for creating balanced artwork. Consider the shape and scale of the elements you’re working with and arrange them in a way that looks visually pleasing and balanced to the eye.
• Values: Values refer to the lightness or darkness of a color. Values can help to create a sense of groundedness and weight in artwork. Consider the light or dark elements you’re working with and how you can use them to create a balanced composition.
• Contrast: Contrast can also be used to create visually balanced artwork. High contrast elements can be used to draw the viewers’ attention to specific areas of the artwork.
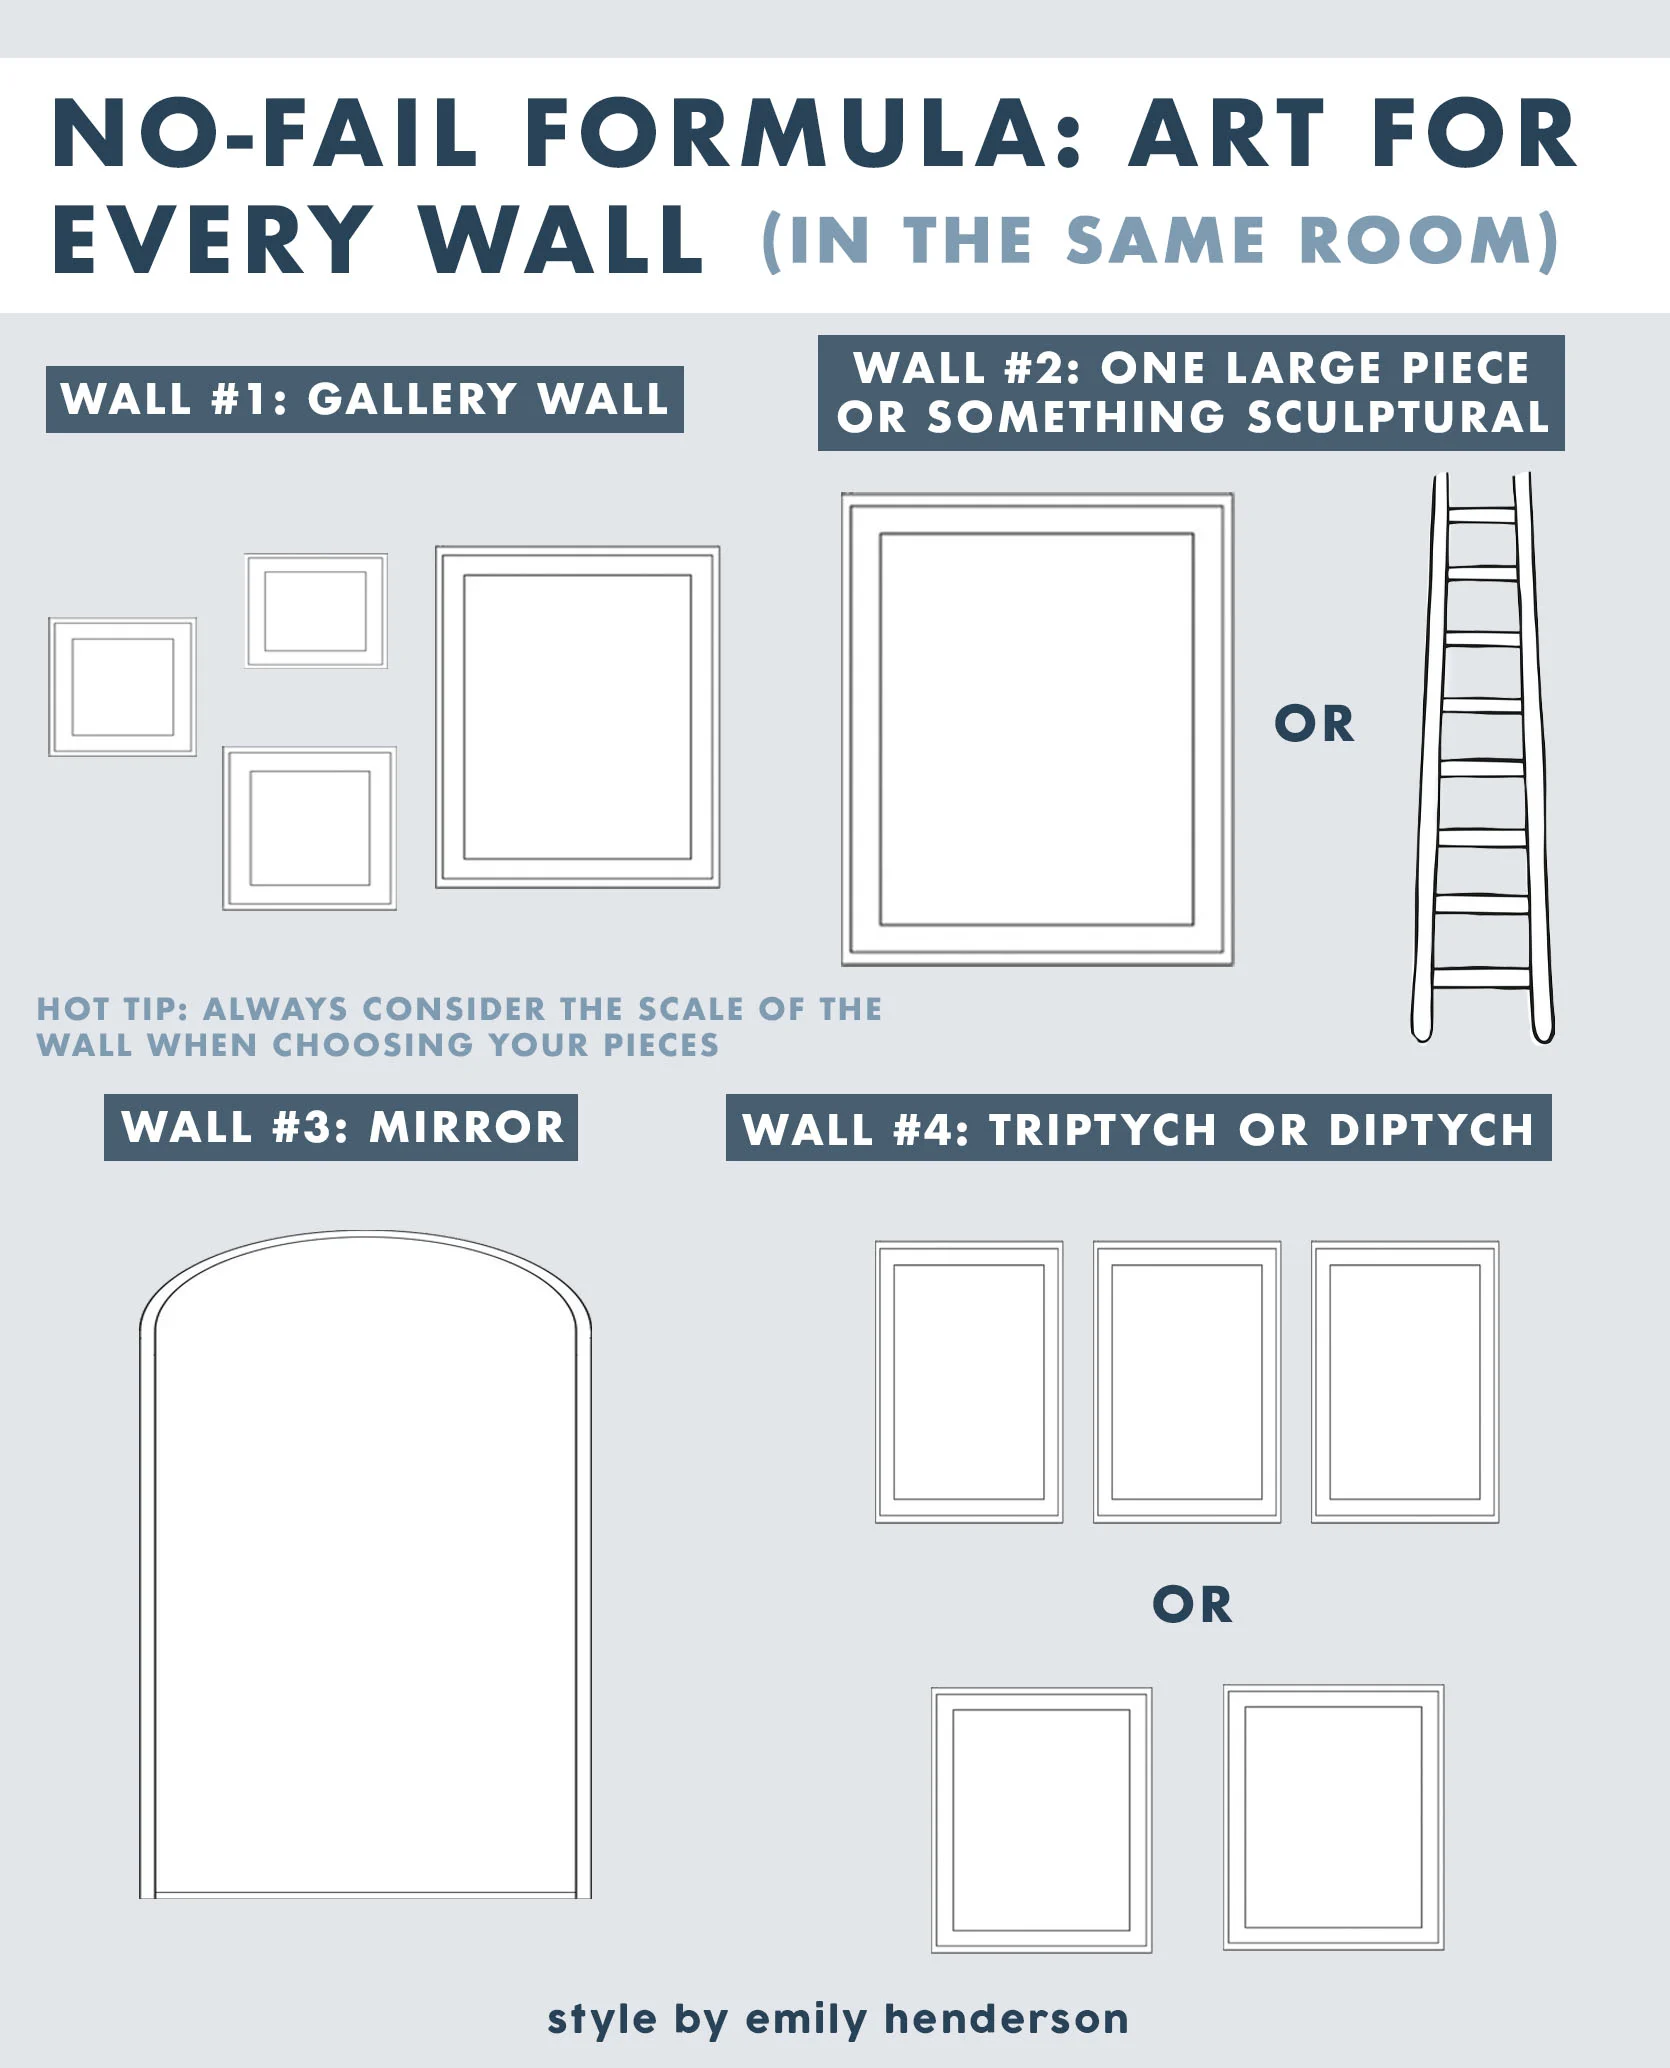
Formula for Decorating All Four Walls
Credit: stylebyemilyhenderson.com
For placing artwork on multiple walls in a single room, here’s advice from Emily Henderson:
Here are the options (pick one for each wall):
One large piece
Gallery wall
Grid
Medium piece
Diptych
Mirror
Stacked pieces
Something sculptural
3 Dimensional, (like a clock)
Credit: stylebyemilyhenderson.com
Balancing all of these elements can be challenging, so it’s important to take it one step at a time.
Start by choosing a few elements and work on perfecting them before moving on to the next.
Take your time, experiment, and have fun – it’s an exciting journey.
With a bit of practice, you’ll be creating balanced artwork in no time.
How long to wait to hang pictures after painting?
When it comes to determining how long to wait to hang pictures after painting, it's important to note that the type of paint used, the brand of paint, the number of coats applied, the dry time of the paint and the environment the painting has taken place in are all factors to consider.
Different paints have different levels of dry time, usually ranging from a few hours to a few weeks, so it is important to consult the manufacturer's directions for the best results.
In general, if possible, it is best to wait about two weeks before hanging pictures after painting in order to allow the paint to fully cure so the pictures stay firmly in place.
How do I choose the right height for art over a mantel?
Photo: Sarah Busby; Styling by H. Camille Smith. From: H. Camille Smith. via HGTV
Choosing the right height for art over a mantel can feel like a bit of a puzzle, but fear not! There's a sweet spot that'll make your artwork look like it was always meant to be there.
Here's a step-by-step guide to nailing that perfect placement above a mantel:
1. Start with the 57-inch rule... with a twist
Normally, the rule of thumb for hanging art is that the center of the piece should be at eye level, roughly 57 to 60 inches from the floor.
But when it comes to hanging art above a mantel, this rule gets a little tweak. Since the mantel itself acts as a visual anchor, you'll be working with the space between the mantel top and the ceiling.
2. Keep it close
A common mistake is hanging art too high above the mantel, which can make the space feel disconnected.
Aim to leave about 4 to 6 inches of space between the bottom of your art piece and the top of the mantel.
This gap is just enough to visually connect the art with the mantel without overcrowding it.
3. Scale matters
The size of the artwork should be in proportion to your mantel and the overall space.
A good rule of thumb is for the artwork to be about two-thirds to three-quarters the width of the mantel.
This balance ensures the art is neither too overwhelming nor too underwhelming in the space.
4. Consider the ceiling height
The height of your ceiling plays a role in how high to hang art over the mantel.
Higher ceilings mean you've got a bit more room to play with, so you can opt for slightly larger pieces or even a more considerable gap above the mantel.
However, in rooms with lower ceilings, you'll want to minimize the space between the art and mantel to avoid making the room feel cramped.
5. Use the mantel as your guide
The decor on your mantel can also influence the placement of your artwork. If you have taller items on the mantel, you may need to hang your art a tad higher to maintain balance. Conversely, if your mantel decor is minimal or low-profile, you can hang your art closer to create a cohesive look.
6. Trust your eye
After measuring and considering all the guidelines, take a step back and trust your intuition. Sometimes, the rules need a little bending to get the look just right for your specific space.
If it feels too high or too low, it probably is.
Adjust accordingly until it feels just right.
7. Temporary placement before the final hang
Before making any holes in the wall, use painter's tape or a removable hook to place your art temporarily.
Live with it for a day or two to see how it feels at different times of the day and from various points in the room.
This step can save you from unnecessary holes and ensure you're happy with the final placement.
By following these steps, you'll create a harmonious balance between your artwork and mantel, enhancing the overall aesthetic of your room. Remember, the goal is to create a visually appealing space that reflects your style while adhering to some basic principles of design and proportion.
Conclusion
Hanging artwork is a skill that goes beyond just placing it anywhere on the wall.
It's important to measure, find the ideal height and position, and use proper installation materials for the job.
You should consider groupings of multiple art pieces or even mixing picture frames with other decor to create an aesthetic.
With a little creativity and patience, you can easily have a beautiful display of art in your home.
Don't forget to download helpful resources like our installation guides which provide instructions on how to correctly hang different types of pieces in various positions.
By following these tips and tricks you can create an eye-catching décor worthy of any home while preventing costly mistakes along the way.
I’d love to hear your thoughts. Please comment.
Would you like for me to put together a customized design for your home?
Let’s schedule a free discovery chat!
If you like what you see on my website, and are considering an in-home consultation, then take the first step today by contacting me to schedule your complimentary discovery call that will be about 20 minutes. Schedule now online or use this contact form, email me, or text me.
Or choose to fill out the design questionnaire!
Additional Resources
How To Hang Art Correctly - 3 Simple Tips - Studio McGee - Our foolproof tips for the #1 design mistake we see: hanging art incorrectly. (studio-mcgee.com)
Three Simple Rules to Follow When Hanging Art in Your Home - Not sure how to hang art? By following these three simple rules for hanging art, whether it is one work of art or multiple, your home gallery will look amazing. (parkwestgallery.com)
6 Simple Tips for Hanging Artwork at the Perfect Height - Boxwood Ave - Learn expert tricks for how to high hang artwork perfectly every time! Foolproof tips for putting together gallery walls and hanging art! (boxwoodavenue.com)
How High To Hang Pictures According To An Interior Designer - Luckily, when it comes to deciding just how high to hang pictures we have a few tricks up our sleeve. A handful of basic principles for you to keep in mind, that will help to ensure all of the photographs + artwork in your home feel cohesive (elegantsi.com)
7 Tips for Hanging Wall Art - If you're not sure how high to hang art on your walls, these tips offer helpful ideas and designer secrets for getting the best look when hanging art. (thespruce.com)
How To Hang Art - Art Hanging Tips, Video, Step-by-Step | Apartment Therapy - Here's how to hang art the right way, including a step-by-step tutorial and one key tip. (apartmenttherapy.com)
Decorating Rules That Will Help You Upgrade Every Room in Your Home | Martha Stewart - Here's a guide to common decorating questions with answers from our experts. Ahead, we walk you through hanging artwork, arranging carpets, and installing curtains in any room of your home. (marthastewart.com)
Hang Artwork Perfectly Every Time—Yes, Really—With the 57 Inches Rule - The 57 inches rule for hanging artwork will guarantee your artwork is hung correctly almost every time. Here's how to use the 57 inches rule, experts say. (thespruce.com)
How High to Hang Pictures, Answered | Framebridge - We answer the most commonly asked questions and offer recommendations for the right height to hang art and photos. (framebridge.com)
How High to Hang a Picture — Celeste Jackson Interiors - Couples don't always agree on how high to hang a picture. In this post you'll find out my basic rule of thumb and when it's appropriate to deviate from that. (celestejacksoninteriors.com)
How High Should Pictures & Artwork Hang? Almost ANY Situation! - Find out the right height to hang artwork no matter what size your picture or mirror is; whether it's hanging above a couch a headboard a mantle or on a wall (kylieminteriors.ca)
How High to Hang Pictures? Tips for the Perfect Gallery Wall | Shutterfly - Wondering how high to hang your pictures? We detail the common 57" rule, tools you'll need and creative photo and gallery wall ideas. (shutterfly.com)
How High to Hang Pictures, Solved! - Bob Vila - Knowing how high to hang pictures improves a room's design and ensures more comfortable viewing! Follow these tips to find the perfect position every time. (bobvila.com)
This 3-step formula for how high to hang pictures will help you nail it – literally - 'What is the correct height to hang a picture?' I can answer that question definitively with this simple formula – and tell you when to break the rules, too (homesandgardens.com)
How High to Hang Pictures: Simple Tips For Getting it Right! - Driven by Decor - Wondering how high to hang pictures, & how far apart to space them? I share the simple tips & measurements you need to get it right! (drivenbydecor.com)
Picture hanging height - proper height to hang pictures - STAS picture hanging systems - We'll tell you all about the proper picture hanging height when hanging paintings or picture frames! (picturehangingsystems.com)
How High to Hang Art Above Console Table with Tier 1 - If you're looking for a guide on how high to hang art above your console table, you've come to the right place! (tier1furnishings.com)
Design 101: How High to Hang Pictures Above Furniture - Have you ever wondered how high to hang pictures above furniture? There are rules of thumb that you can follow and I'm spilling the beans. (jacquelynclark.com)
How to hang art on a wall: Tips and advice for the right height - If you've got a lot of blank walls and art pieces that need a new home now could be the time to hang them u... (9now.nine.com.au)






















A quick bit of business: Whenever I recommend or link to products and services on this page, I may (and probably do) receive affiliate commissions on purchases, at the same price as advertised. The opinions I express are my own, but they are honest, and I do my part to recommend products I I have found to be valuable and credible. I will be happy to answer any questions you may have. Feel free to contact me using the contact form via the menu, or read my affiliate disclosure statement and my terms + conditions page here. You’ll brighten my day with your support! Thank you.